background

Sunday, September 16, 2012

Clamshell Baby Quilt

I finished a quilt!  This makes two crib quilts that I have completed, and two tops that still have to be quilted.  Oh, and one bunch of fabric that needs to be pieced.  Oh well, just another item on my long list of projects.  But this quilt for my new niece is done!

My nieces' nursery is beach themed, so I decided to make a clamshell quilt.  Traditional clamshell quilts were made with scraps of fabric so were very random looking.  I threw caution to the wind and bought over 10 different fabrics with mermaid and beach designs.  Then I traced and cut out many many many (140-ish) little clamshells.


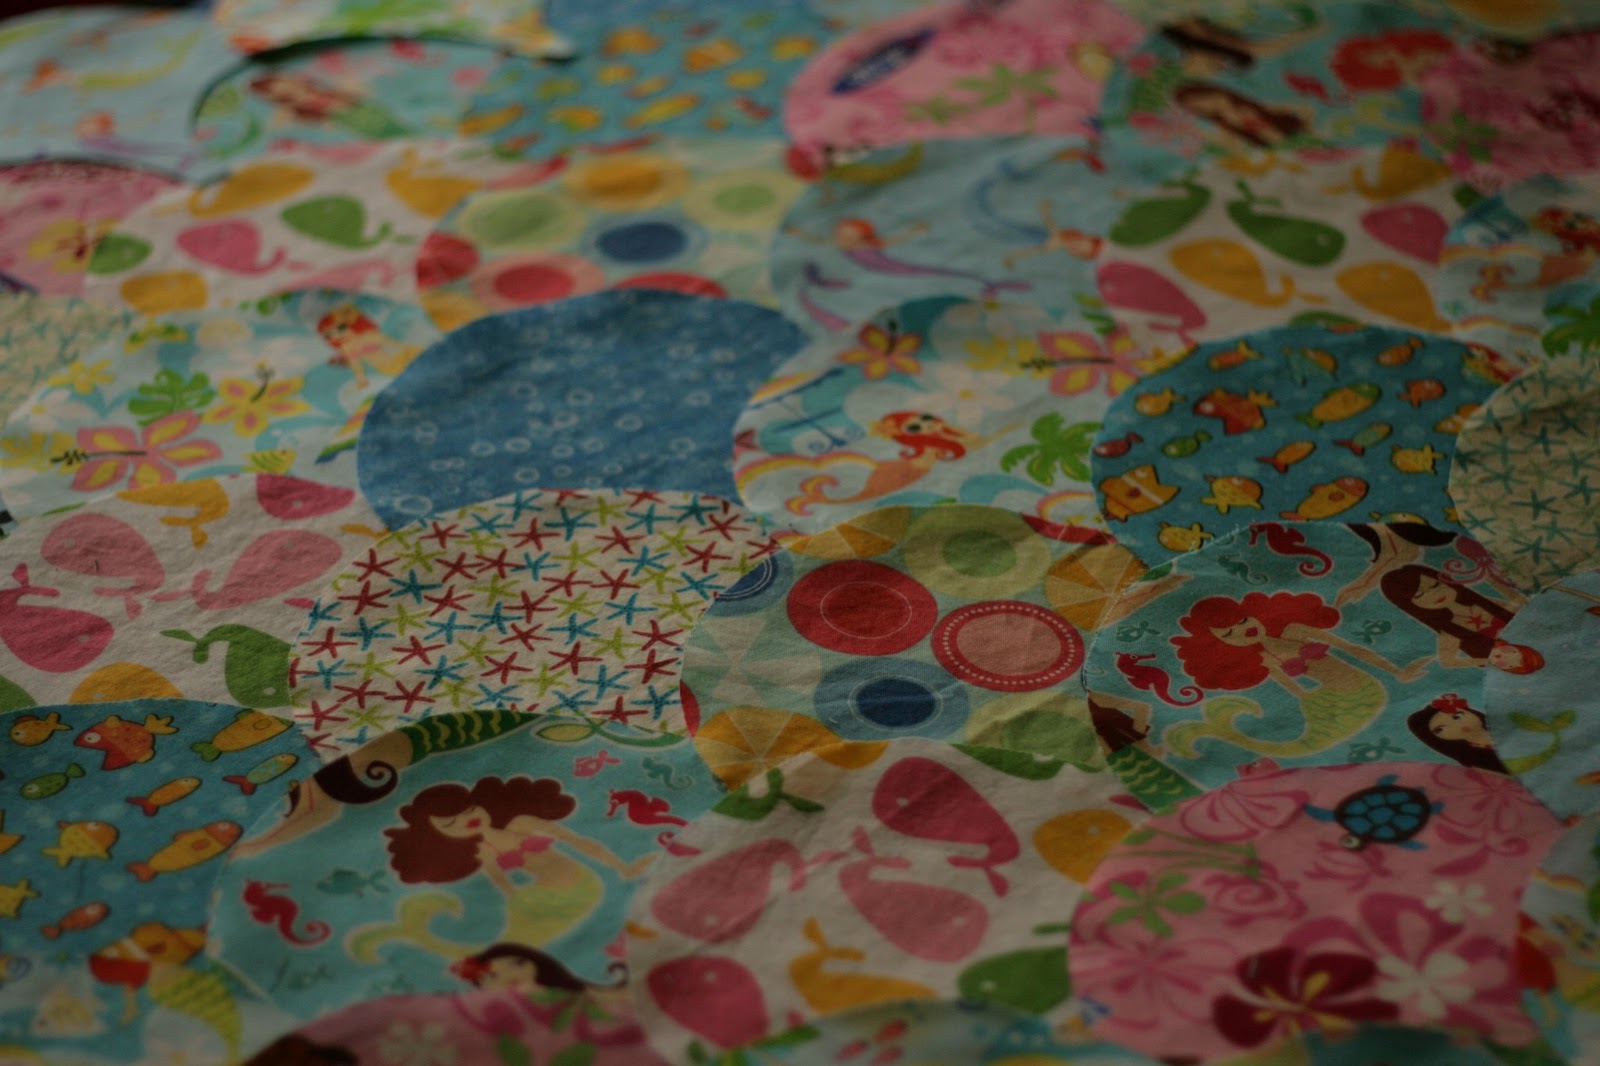
This is much more colorful and busy than anything I've ever made before.  I like symmetry and order, so it was really hard for me to randomly lay out these pieces.  First I tried listing each shell in a random number generator and arranging them the way it told me.  But once I got a look at it, there were too many of the same fabric near each other or touching.  I ended up laying out each row very carefully to make it look random.


Then for over a year I sewed the shells together by hand.  The curved edge is folded down and appliqued to the bottom of the shell above it.  I looked at a lot of tutorials online to figure out how to make the process a little easier.


I forced myself to finish days before the little girl's first birthday.  While I love the end result, I doubt I will ever hand stitch another quilt top.  A friend of mine is addicted to English paper piecing, so to each their own.


Saturday, September 15, 2012

Tuckered Out

Meet my new friend, Tucker Beano.  He is just a little toddler monster, but he's always getting into BIG trouble!  


He's made from the Mostro pattern by Project Puppet.  Their patterns are versatile and easy to follow, I'd recommend them to anyone serious about making puppets.  You will need some non-traditional crafting supplies (like contact cement) that you can buy at most hardware stores.  


There are two parts to the pattern- an inner foam structure and the fur or fleece skin.  My daughter thought that the foam was a new squishy toy to cuddle with.  


Once Tucker's basic body and head was finished, it took some trial and error to get his eyes just right.  He even had three little eyes at one point.  But without eyes he was called Cookie Monster by too many people.  Eventually, as a punishment, I started lecturing people about "live-hand" vs. hand puppets and I watched their eyes glaze over as they wondered what was for dinner.


Toddler clothes fit this little guy, so I used an iron-on of a Monster Viking that you color yourself.  It's probably Tucker's favorite Monster Sport team.  What games do monsters play?  Furball?


The best thing about a puppet is the reaction it gets from children.  I expected little kids to like him, but when a twelve-year-old girl played with him for a long time I was pleasantly surprised.  

Bye bye!


Rockin Round Robin Challenge

I participated in a Round Robin challenge with my doll club this year.  We each made a doll body and blank head and placed it in a brown paper bag.  The doll was then passed from dollmaker to dollmaker, each artist completing one of the dolls features.  One worked on the face, another the hair, etc.  This has been going on for months, but today we got our original dolls back!


I chose Ute Vasina's Little Folks pattern for my base.  He is made with doe suede, a buttery fabric that hides seams well.  I needle sculpted an extra face in case the first person to get my bag was afraid to needle sculpt.  Then he went into a bag and was hidden from me for nine months!    


I was particularly happy with the work on did on some of the other dolls.  I had never worked on  finished a flat face before.  Painting the features on is a challenge for me.  I don't have control of the amount of paint or the movement of the brush and I give up before I really start.  I had no idea how I was going to make this work.  


I'm Gen X, I figure I can use technology to help me with anything, right?  So I took a picture of this pristine white face on a one inch grid.  I scaled the photo so that it printed exactly life size.  I even found faces I liked and used transparent overlays to find features I liked.


I printed one out that I was satisfied with, folded it in half and pinned it to the head.  Then I drew a mirror of the printed image.  Over and over and over again.  So, eventually the face was drawn in pencil, but so what?  That's not presentable...  I decided to try colored pencil instead of paint.  I have a lot of Prismacolors, and assembled the colors from their portrait set.  AND I checked every dollmaking book out of the library and followed every direction for coloring faces I could find.  


It took layer upon layer of colored pencil to get the effect I wanted, but I was so happy with the results. I hope I can replicate the process with some of the unfinished dolls I have in the closet!

So here's the big reveal.....
It's Snickle Fritz!  Fritzie for short.  
He likes to play tricks on, well, everyone.  
And he's kind of crotchety, but like the old man in Up, everyone loves him anyway.


Face by Julie G, clothes by Mary, hair by Nita, embellishments by Ann R, shoes by Ann C, and presentation by Julie W.  Thank you all for such wonderful work!


We all worked on Fritzie, but I'm glad he gets to come home with me!
To see all the other round robin dolls, visit the Indy Cloth Dollmakers blog.

My Chinny Chun Woo

My doll club was fortunate to have Leslie Molen come for a workshop.  She is an amazing instructor, if you have a chance to learn from her, take it!


We chose to make a little Chinese doll named Chun Woo.  Our homework was to have almost the entire doll and costume finished.  We were working on the head and assembly of the body in class.  I made her shirt and hat from beautiful Anna Griffin fabric, and the pants coordinate so well with huge blossoms on them.


Here are her hand painted buggy eyes.  Chun Woo has a needle sculpted face that is covered with another layer of cloth for a cleaner look.


It's hard to believe the difference that eyelids and some makeup made!


And here she is all finished!  I love her so much.  The experience was amazing, from the new techniques that I learned to the little tips Leslie had for making a face more innocent.


Thank you Leslie for being a great teacher and for designing such beautiful dolls.  If you haven't yet, please check out her website or blog.

Origami Lotus

I got married on a small budget.  Well, a budget that kept growing and growing, and was pretty large for me.  To make up for the cost of the food and venue, I did a lot of the decorations and favors DIY.  The centerpieces were origami lotus flowers that I saw in Chinese Origami by David Mitchell.  The book doesn't seem to be in print anymore, so here are the instructions for making a Buddhist origami lotus flower.

Photo courtesy of Lisa K. Fett
Top side of paper.
Traditionally, this is made with Hell bank notes.  It's an unfortunate name for fake money the Chinese burn to honor the dead, and "Hell" means "the afterlife."  It measures 5 7/8 inches by 3 3/8 inches.     I bought origami paper in the color I wanted and cut it to size with a heavy duty paper cutter. 


Turn the paper upside down.


Fold in half with the right side out.


Fold in half again from right to left and crease.


Unfold.  You will have a square divided into two rectangles.


Turn over from right to left.  The folded side of the paper will be facing you.


Fold the right bottom corner in toward the center.


Repeat with the left bottom corner.


Fold the resulting bottom sloping edge toward the center.


Repeat with other side.


Fold the piece in half, with the point meeting the top edge.


Press all creases well.


Turn the piece over from right to left.


Fold the little ears over the top edge.


Tuck the ears in between the layers of the top edge.


Here are the ears hiding in their pocket.


Fold the top right corner toward the middle of the left edge.  The crease will be from the top center to the bottom right corner.  Crease and unfold.


Repeat with the top left corner.


Both top corners now point toward you.


Turn the piece over from right to left.  


Unfold the front flap.


Hold the petal with the back points together.


Unfold the front flaps by lifting up the first layer and pushing the small horizontal crease outward.


Leave the bottom layer of paper laying down in the center or else the wrong side of the paper will be seen in your petal.


Repeat with the other side.


You finished a petal!  Now make a total of 27 petals.


The flowers are layers of five petals stacked together.


Insert the back flaps (the ones with the little ears folded inside) into the side pockets of two more petals.


Think of this step as a bridge between the petals.


This probably breaks the cardinal origami rule, but I glued the flaps into the pockets for each petal.  I wanted the flowers to be transported to the reception and arranged quickly on the tables.


Move around the circle stacking petals in between the two petals below.


Continue stacking until you have three rows of five petals.  Finish by placing two petals facing each other into the center of the top layer.


 With a little help from friends, I made over 600 petals and 36 lotus flowers.  It took months, but was so worth it!
Photo courtesy of Lisa K. Fett
You can also stack more than three rows of petals and make a larger flower.  Or, try a HUGE lotus with rows of 10 petals.  If you try one, I'd love to know how it turns out.