background

Showing posts with label Completed dolls. Show all posts

Saturday, September 15, 2012

Tuckered Out

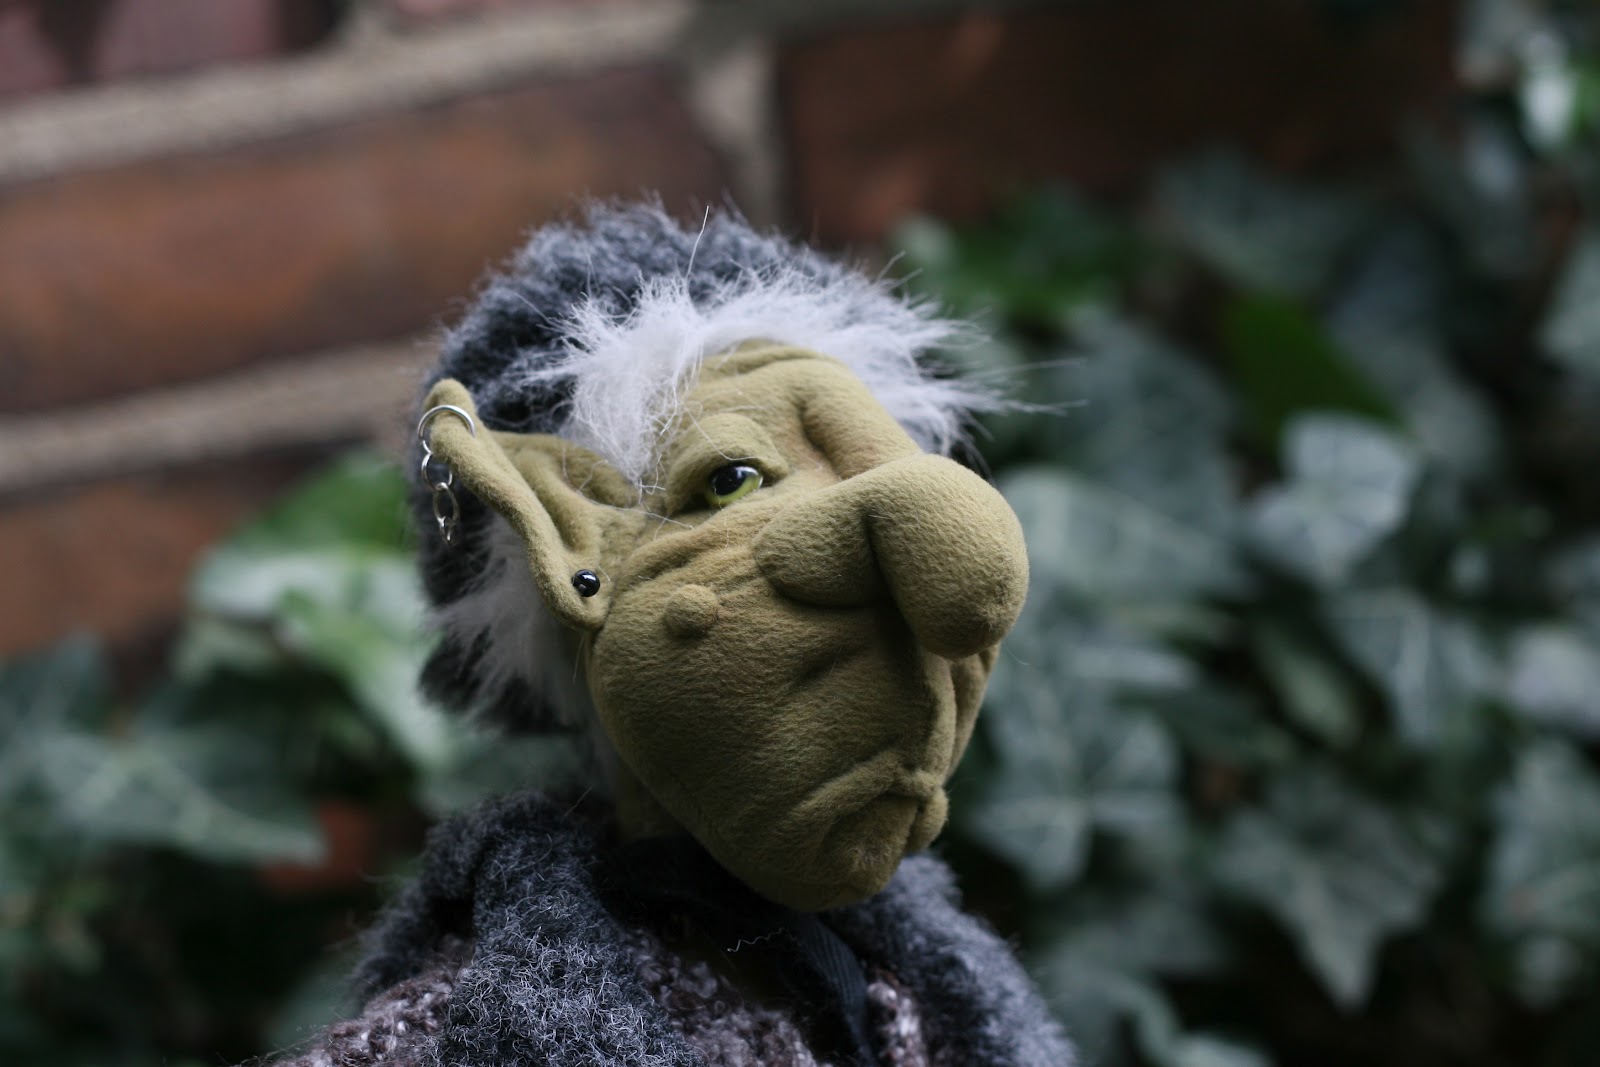
Meet my new friend, Tucker Beano.  He is just a little toddler monster, but he's always getting into BIG trouble!  


He's made from the Mostro pattern by Project Puppet.  Their patterns are versatile and easy to follow, I'd recommend them to anyone serious about making puppets.  You will need some non-traditional crafting supplies (like contact cement) that you can buy at most hardware stores.  


There are two parts to the pattern- an inner foam structure and the fur or fleece skin.  My daughter thought that the foam was a new squishy toy to cuddle with.  


Once Tucker's basic body and head was finished, it took some trial and error to get his eyes just right.  He even had three little eyes at one point.  But without eyes he was called Cookie Monster by too many people.  Eventually, as a punishment, I started lecturing people about "live-hand" vs. hand puppets and I watched their eyes glaze over as they wondered what was for dinner.


Toddler clothes fit this little guy, so I used an iron-on of a Monster Viking that you color yourself.  It's probably Tucker's favorite Monster Sport team.  What games do monsters play?  Furball?


The best thing about a puppet is the reaction it gets from children.  I expected little kids to like him, but when a twelve-year-old girl played with him for a long time I was pleasantly surprised.  

Bye bye!


Rockin Round Robin Challenge

I participated in a Round Robin challenge with my doll club this year.  We each made a doll body and blank head and placed it in a brown paper bag.  The doll was then passed from dollmaker to dollmaker, each artist completing one of the dolls features.  One worked on the face, another the hair, etc.  This has been going on for months, but today we got our original dolls back!


I chose Ute Vasina's Little Folks pattern for my base.  He is made with doe suede, a buttery fabric that hides seams well.  I needle sculpted an extra face in case the first person to get my bag was afraid to needle sculpt.  Then he went into a bag and was hidden from me for nine months!    


I was particularly happy with the work on did on some of the other dolls.  I had never worked on  finished a flat face before.  Painting the features on is a challenge for me.  I don't have control of the amount of paint or the movement of the brush and I give up before I really start.  I had no idea how I was going to make this work.  


I'm Gen X, I figure I can use technology to help me with anything, right?  So I took a picture of this pristine white face on a one inch grid.  I scaled the photo so that it printed exactly life size.  I even found faces I liked and used transparent overlays to find features I liked.


I printed one out that I was satisfied with, folded it in half and pinned it to the head.  Then I drew a mirror of the printed image.  Over and over and over again.  So, eventually the face was drawn in pencil, but so what?  That's not presentable...  I decided to try colored pencil instead of paint.  I have a lot of Prismacolors, and assembled the colors from their portrait set.  AND I checked every dollmaking book out of the library and followed every direction for coloring faces I could find.  


It took layer upon layer of colored pencil to get the effect I wanted, but I was so happy with the results. I hope I can replicate the process with some of the unfinished dolls I have in the closet!

So here's the big reveal.....
It's Snickle Fritz!  Fritzie for short.  
He likes to play tricks on, well, everyone.  
And he's kind of crotchety, but like the old man in Up, everyone loves him anyway.


Face by Julie G, clothes by Mary, hair by Nita, embellishments by Ann R, shoes by Ann C, and presentation by Julie W.  Thank you all for such wonderful work!


We all worked on Fritzie, but I'm glad he gets to come home with me!
To see all the other round robin dolls, visit the Indy Cloth Dollmakers blog.

My Chinny Chun Woo

My doll club was fortunate to have Leslie Molen come for a workshop.  She is an amazing instructor, if you have a chance to learn from her, take it!


We chose to make a little Chinese doll named Chun Woo.  Our homework was to have almost the entire doll and costume finished.  We were working on the head and assembly of the body in class.  I made her shirt and hat from beautiful Anna Griffin fabric, and the pants coordinate so well with huge blossoms on them.


Here are her hand painted buggy eyes.  Chun Woo has a needle sculpted face that is covered with another layer of cloth for a cleaner look.


It's hard to believe the difference that eyelids and some makeup made!


And here she is all finished!  I love her so much.  The experience was amazing, from the new techniques that I learned to the little tips Leslie had for making a face more innocent.


Thank you Leslie for being a great teacher and for designing such beautiful dolls.  If you haven't yet, please check out her website or blog.

Friday, October 7, 2011

Hanging Doll Exhibit

My doll club was given the opportunity to display our dolls in  local jewelry store, given one stipulation:  the dolls needed to be hung on the walls- shocker!


I had plans to make a plush seahorse doll that would fit into a pocket of seaweed on an embroidery hoop.  It was going to be a cute toy, but what came to be was entirely different.  I knitted the background fabric with a wonderfully soft yarn, Mochi Plus.  (The scarf I made of the same yarn is a little too short because of this project, but it was worth it!)  The seahorse is batiked cotton, embellished with beads.


The other club members found clever ways to display their dolls as well.  Katie Jones, Nita Butler, Julie Gausvik, Martha Jungclaus and Andrea Baughman contributed many beautiful dolls.


And my future doll maker hung out with her favorite artists at the gallery opening.

Julie, Bea, and Martha

Friday, September 2, 2011

Fairies in their Natural Habitat


I love this pattern for fairy houses by Julie McCullough. I've made it smaller than suggested, and modified it a little bit so that each house is unique.


I designed this simple fairy to sell with the houses, but got stuck sewing their arms and legs on. My doll club recently had a little class on jointing techniques. I decided ribbon jointing would be perfect for these fairies. It allows the limbs to swing free while being completely attached to the body. In fact, it will be hard for little hands to tear the limbs off because the arms and legs are all connected inside the body. So, if you pull the left arm, the right leg moves with it.

I also love working on their hair. I've been using Homespun yarn because it looks wavy and the colors are so pretty with lots of highlights.

I've started an Artfire shop, so stop by if you'd like to buy some handmade dolls!

Thursday, August 18, 2011

Dolls

In high school I worked at JoAnns. At the time, I was making a lot of clothes. But I would look at all the magazines, and I was intrigued by the fairies in the doll magazines. I fell in love with Lisa Lichtenfels and her realistic nylon sculptures.

I didn't make any dolls, though, until I found a library display by the Indy Cloth Dollmakers. And I joined, and found a very encouraging bunch of ladies (and one gentleman)!

My first doll was from the Norman pattern by Ute Vasina. I made him out of felt because I didn't want to spend a lot of money on a "trial." The felt made him difficult to turn, but I love how he turned out (even if he is naked).

This is a cloth version of architect Philip Johnson. I modified a pattern by Shelley Hawkey to make his peaceful face. His face and clothes intimidated me, though, and I kept putting him away. I think it took 2 years to finish him!

This little munky only took a little while to finish, though. He's from the Aranzi Aronzo book Cute Dolls. I've made a few of the dolls in the book, and have a few that just need the faces sewn on. I have a problem with follow-through...

Until I jumped in, I didn't know that there was such a large community dedicated to making dolls and selling patterns and supplies. If you are interested, Dollmaker's Journey has everything you need to get started. Have fun!